On this occasion we are going to explain what you should do to know how to clean your Facebook activity log, a new option that the social network makes available to us to be able to carry out all this process in a faster and more comfortable way, without having to go publication by publication deciding which ones you are interested in deleting or hiding so that they are no longer visible to users, which will allow you to save a great deal of time when managing your user profile on the platform.
You may find yourself needing or wanting to try to wipe the slate clean on your Facebook user profile, and you'd rather do it without deleting all content or having to close your account, and lose all your friends and conversations and start from scratch. For this reason, this new Facebook tool is a perfect option, especially considering that it is used from the mobile app, in such a simple way as we are going to explain below.
In this way, you can carry out the entire process in a very comfortable way from your own smartphone, whether it has an Android operating system or if it is iOS (Apple).
How to clean your Facebook activity log step by step
To make it much easier for you to carry out this process, we are going to explain how to clean your Facebook activity log, and we will do it step by step so that you can not have any doubt about it:
First of all, you must access your Facebook application on your smartphone, where you will have to first click on the icon of the User profile in order to access it. Once you are in it you will have to click on the button with the three ellipsis which you will find on the right side of the Add to History button, which is just below your username on the platform.
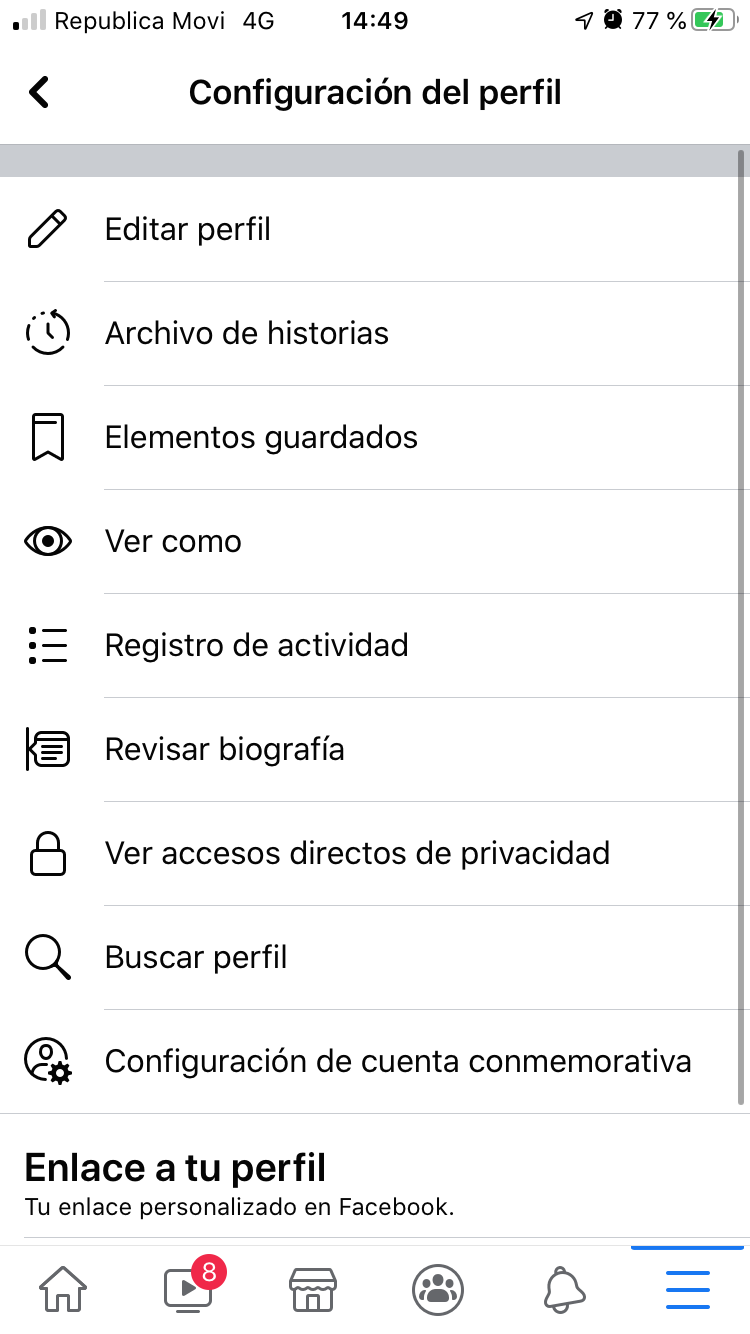
Once you do, you will access the following image, in which you can see all the Profile settings. Among them you will find the option Registro de actividad, which is the one you have to click on.
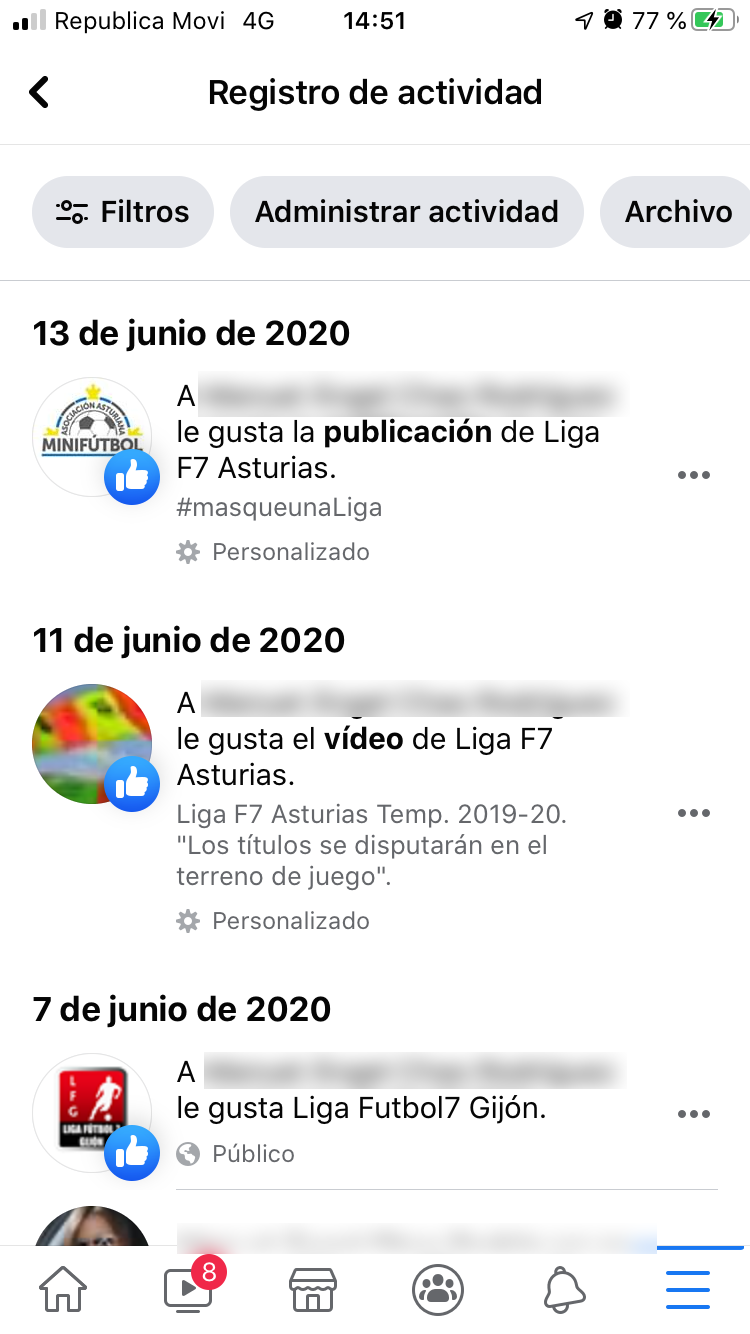
Once you have done it, you will find the following window, in which you can see your latest interactions in the well-known social network, ordered by date and showing you the likes you have given to pages, to publications, and so on.
Once you are in the aforementioned activity log, it is time for you to click on Manage activity, which is at the top of the screen and which will open a small window in which you will have to click on Your posts. This is the only option there is and it will help you to manage your publications on the platform.
When you have pressed, you will see how it begins to load and the following window of Your posts. In this list with all your publications that you have made on the social network, which are ordered chronologically, you will find the type of content published and a box on the left that you will have to press to select all those that you are interested in removing from your account.
Once you have selected all those that you are interested in deleting or archiving, you will find two buttons at the bottom that you can click on. These are called File y Move to trash.
In this way you can choose if you want to simply archive those publications so that they are hidden in your Facebook user profile or if, on the contrary, you want them to be deleted. In any case, Facebook has a system that will allow you to regret it if you regret having deleted a publication, since these images will only be automatically deleted after 30 days if you have not decided to recover them. Meanwhile they will be hidden.
On the other hand, you should know that in this Registro de actividad you find the option Filter,, Thanks to which you can choose if you only want a particular type of content to be shown on the screen, organized in categories or within a certain range of dates. This is perfect to be able to get much faster to the type of content that you really want to remove from your Facebook account.
So, if you only want to delete or hide some types of publications in particular, you can do it in a much faster way and without having to go looking one by one among all of them, something very tedious if you have many.
Also, at the top you will find the options File and Trash, which will allow you to be able to consult at any time the publications that you have decided to archive or send to the trash of your account. This way you can recover them if you consider it at some point.
Finally, it should also be remembered that you have the possibility to perform actions on each publication in an independent way.
In the event that you want to do it from the web, you can get to your activity log following a similar process, that is, going to your profile and clicking on the button with the three dots, which will bring up a menu in which you will have what to select Registro de actividad.
However, you should know that you will have to delete each publication individually, since in this case there is no possibility of being able to select a large number of them and proceed to their archiving or elimination automatically. For this reason, it is preferable to do it from a mobile phone, since you will have greater comfort to carry out this entire process.
That said, you no longer have an excuse to keep your Facebook account in perfect condition and delete all those publications that, for one reason or another, you no longer want to continue having on your profile on the well-known social network. A nice tool offered by Mark Zuckerberg's company.


